Table of Contents
This is an old revision of the document!

REF: Oiling & Lubrication
Installing an Oil Pressure Gauge
The presence of oil pressure is usually measured by whether the oil light is on or not.
The so called, idiot light, simply lets you know that the oil pressure is high enough to actuate the oil pressure switch and then the light.
The check valve (or check ball, respectively) opens between 4-6 psi.
So at all times, the pressure gauge should at least read that much as measured at the oil pressure switch.
Do not eliminate your oil light, this is your first and best indicator of proper oil flow. 1)
Gauge Selection
Using the correct gauge means considering the gauge accuracy required at the pressure point being tested.
Low range pressure gauges will be more accurate on a hot engine when the oil is viscous and the pressure is low.
During a cold startup, the pressure will be higher due to thicker oil when cold.
Likewise, a 0-30 psi or 0-60 psi gauge will peg out on a cold startup which could possibly ruin the gauge.
But it will show a more accurate reading when the engine oil is hot and at low pressure.
Whereas a 0-100 psi gauge will be more accurate during a cold startup but less accurate during normal operation with hot oil.
Glycerin filled gauges may withstand more vibration than non-liquid gauges.
Testing Points
Oil Pressure Switch:
Oil is more restricted at the oil pressure switch than say at the rocker boxes.
So oil pressure will be higher when tested at the switch than when tested in the rocker box.
Rocker Box:
Depending on the gauge selected, there may be little to no oil pressure registered on a high range gauge testing form the rocker box.
(the gauge may show some pressure when the oil is cool and thick but may not show any after 5 minutes of running) 2)
Matching PSI Specs in the FSM
The FSMs for all years include suggested oil pressure figures for each model when testing.
Most FSMs suggest taking the oil pressure reading by removing the oil pressure switch and placing a gauge (or gauge line) there.
The exception would be 86-90 models (with a reference also to 91 models).
(where the pressure data in the manual was taken from the plug hole on the engine case between the tappets)
However, due to the testing points that are suggested, placing a gauge anywhere else doesn't help you match or verify oil pressure per the manual.
(or won't provide any relevant information that you can compare to the manual)
Some say an oil pressure gauge makes a nice back-up to the oil light though. 3)
However, you can fit a gauge in other places to simply show some pressure for peace of mind prior to each ride.
The gauge should show some pressure even if it's not to par with the manual.
Expected Oil Pressure
See Sportster Oil Pressure (57 to Present) in the Sportsterpedia for oil pressures per the FSMs.
Gauge Mount Locations
Test Point Locations
IH Oil Pressure Switch at Oil Pump
Remove the oil pressure switch from oil pump and install an 1/8“ hose or tee fitting, then an 1/8” the hose to the oil gauge.
Mount the oil gauge where it can be seen during operation.
You can use a flexible braided rocker box oil lines and mounted the gauge just off of the forward controls or on the downtube.
| Oil pressure gauge on a 75 model downtube 4) | |
 |  |
| Oil pressure gauge on a 74 model mounted down low by the forward controls 5) | |
 |  |
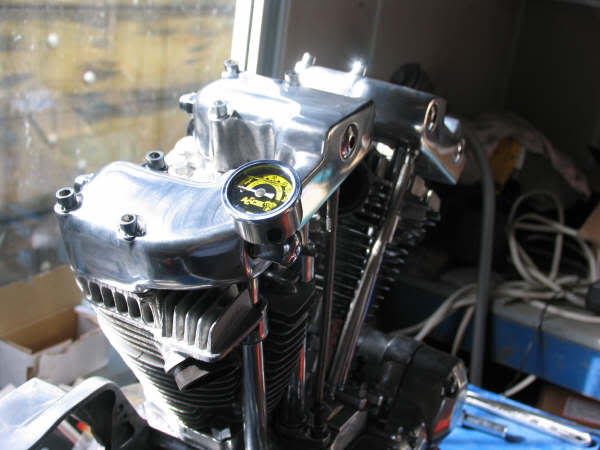
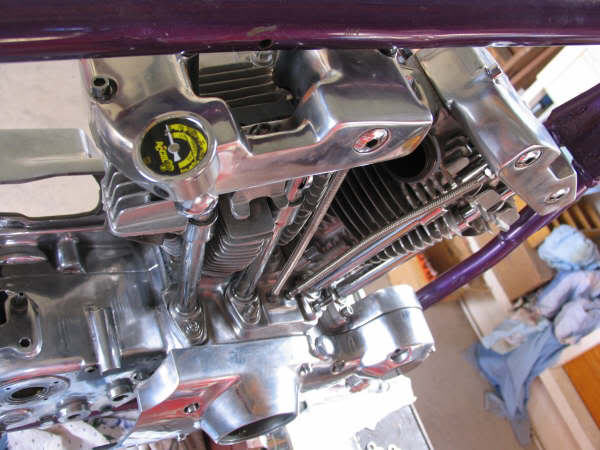
IH Rocker Box
This was done on the rear rocker box of a 77 model Sportster. 6)
With the engine in the bike, simply remove the rocker shaft end plug and screwed in the adapter and the gauge. 7)
There is no need to remove the heads.
Parts:
Foghollow part number (H80409) for adaptor and (H80811) for the gauge.
 |
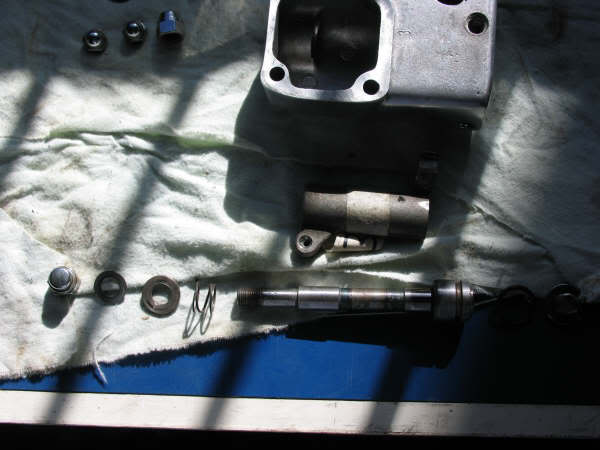
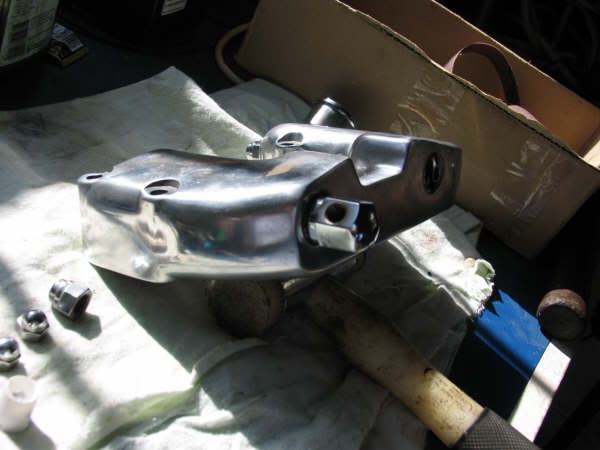
The end plug was removed and replaced with a gauge adaptor. The gauge will be installed there. 8)
 | 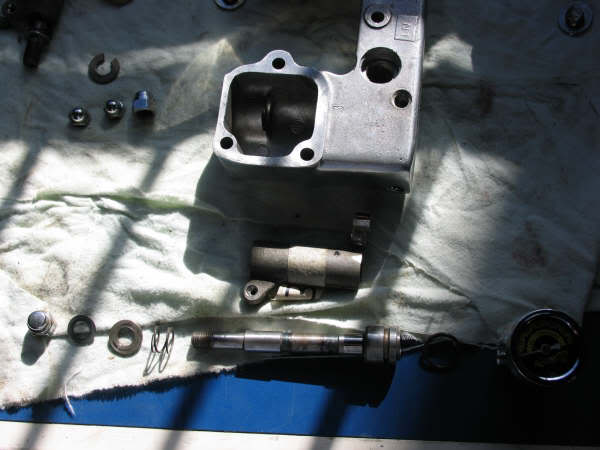 |  |
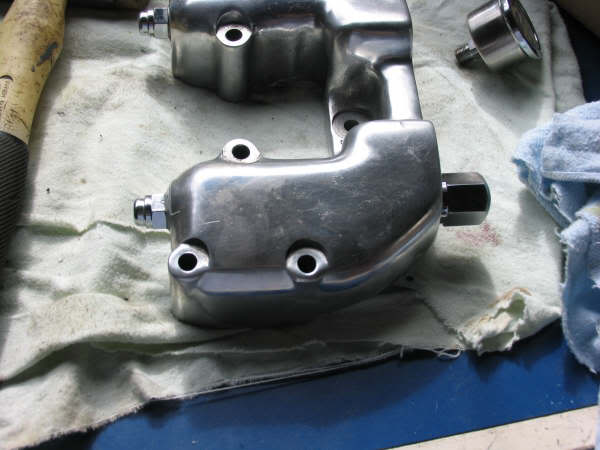
The lubricated shaft was fitted back into the rocker box. Be sure that the spring and spacer washer are in place.
Fit the O-ring and gauge adaptor and lightly screw up by hand. You can use a bit of rubber grease on the O-ring to make it slide into the rocker box nicely.
Fit the aluminum shaft washer and dome nut. You can also put a bit of Permatex silicone on each side of the washer, as this doesn't spin once it tightened up. 9)
 |  | 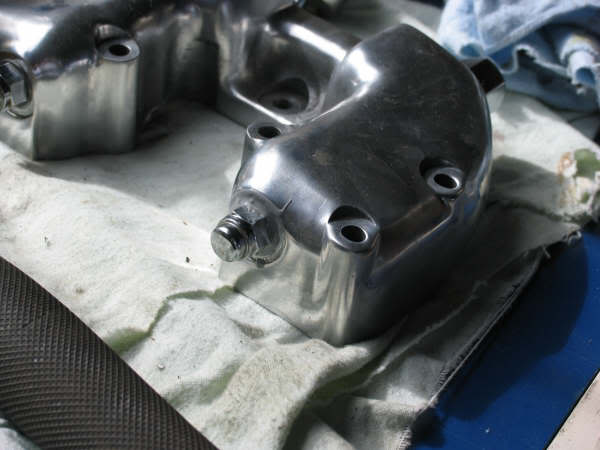 |
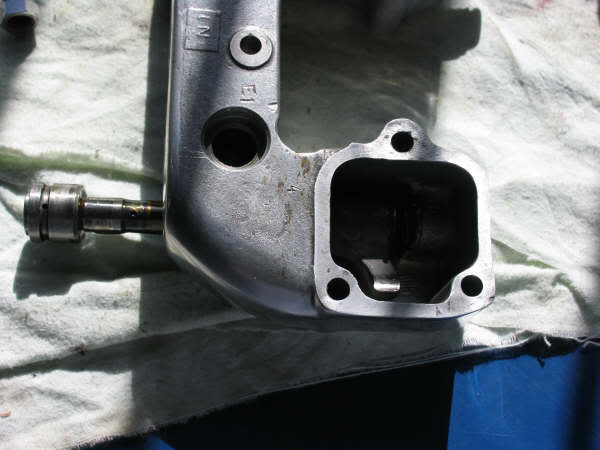
Tighten each side a bit at a time so that you get the gauge mount oil hole in the right spot.
Tightening each side slowly allows the O-ring to slide into the rocker box and not catch on an edge.
Tighten to specs and wipe off the excess Permatex on that one end. Add a bit of liquid thread sealant on the gauge threads.
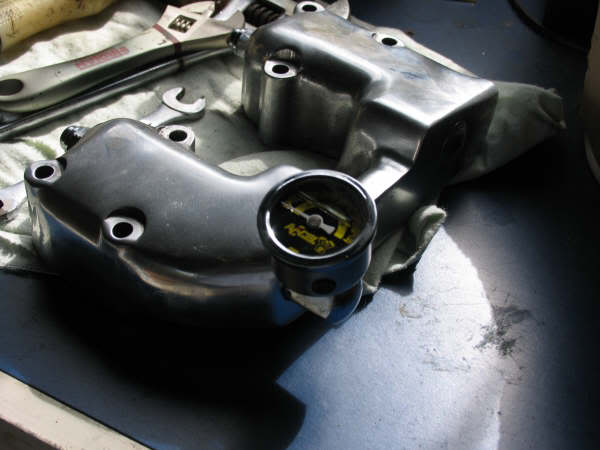
Make sure the angle of the gauge is good from your sitting position. You can back off the shaft nut and relocated the shaft if needed. 10)
 | |  |