Table of Contents
This is an old revision of the document!

REF: Wheels, Brakes & Tires
Sub-Documents
* . . . Next Subject
Brake System
- Brake caliper mounting bolt O-rings- Dow Corning 44 grease (“Pin Lube” in parts kit) 1)
- O.D. of brake caliper piston (including chamfer), caliper piston bore and I.D. of the installed piston seal - Novaguard silicon grease.
- I.D. of upper caliper (threaded) bushing bore, O.D. of threaded bushing, I.D. of upper and lower caliper mounting pin bores - Dow Corning 44 grease (“Pin Lube” in parts kit) 2)
Aftermarket Brake Parts
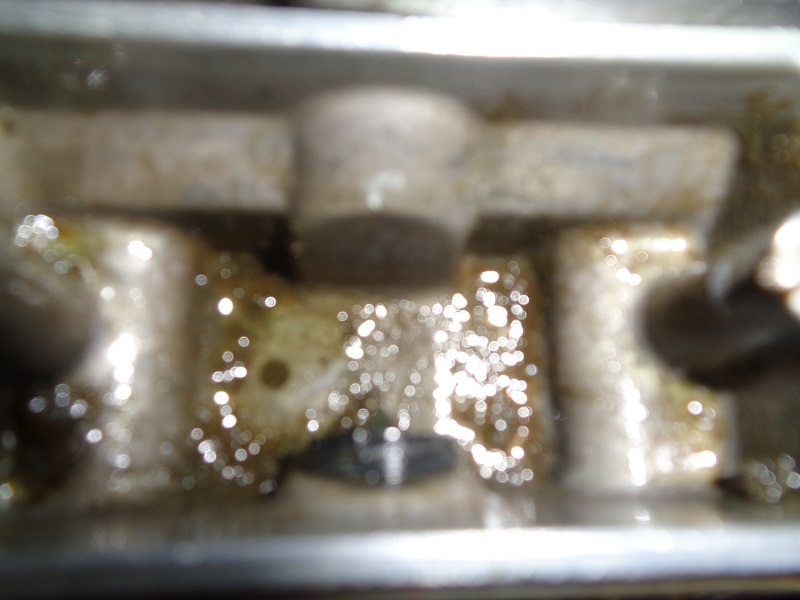
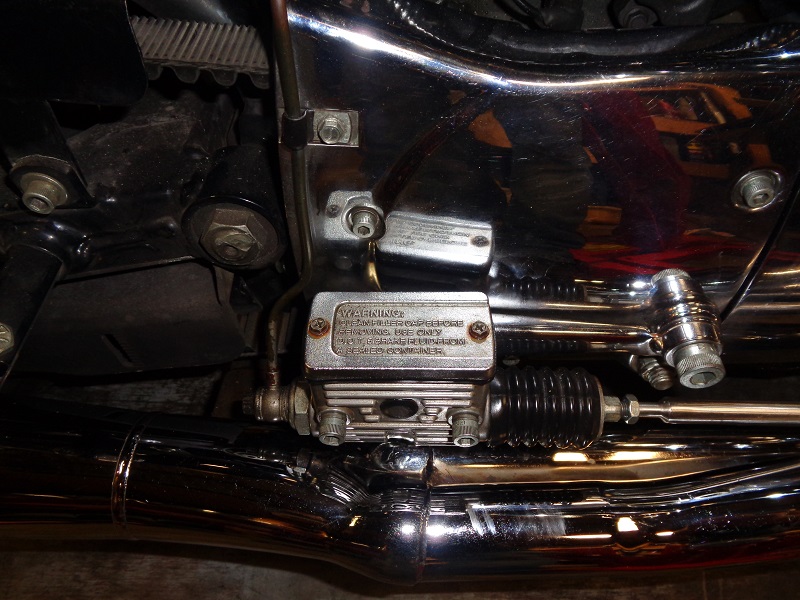
Aftermarket brakes vs OEM brakes Check fitment of aftermarket brakes before using them. Just because they are published as 'will fit your vehicle' doesn't make it so. The pics below are a comparison of OEM brakes and an aftermarket brand:
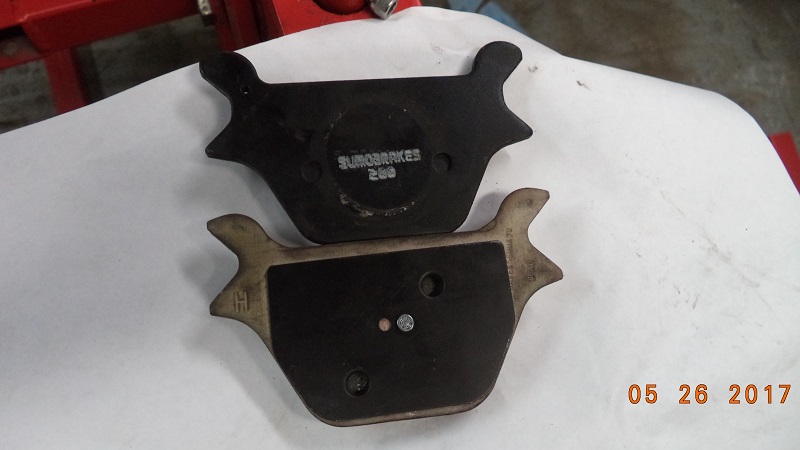
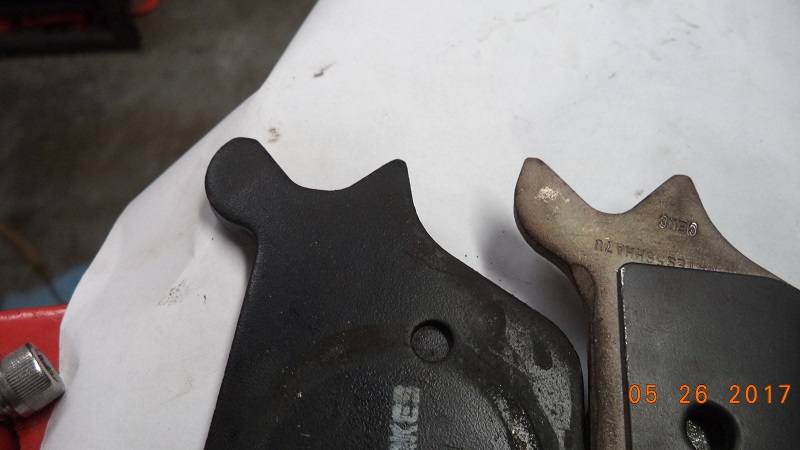
The light colored OEM brake has sharper contours to match up to the screw mounting bracket shims it rides against. The aftermarket brand is slightly shorter in length than OEM which allows it to wiggle around a bit since it doesn't fit tight against the screw shims which can allow it to drop below the disc resulting in poor pad wear and possible disc wear or disc drag as in the pic below:

Be sure your brakes can not wiggle around before installing the caliper.
Brake Fluid
HD Recommendations
When to Check or Change Brake Fluid
| Year Model | Check | Change |
|---|---|---|
| 1959-1969 | ||
| 1970-197810) | Every 2,000 miles | Every 5,000 miles |
| 1979-198511) | Initial 500, then every 2,500 miles | Every 2 years |
| 1986-199012) | Check at initial 500 then every 5,000 miles, prior to storage or annually | Change/ Replace as needed |
| 1991 to 200313) | Every 300 til and including initial 1,000 miles, then every 5,000 miles | Replace as needed |
What Type Brake Fluid Do You Have
When in doubt,
- 1st check your bikes service manual to see what should go in it.
- Next, get a few drops of brake fluid from your brake reservoir and put them in a small container. Add a few drops of water and mix it all together.
- If the water mixes with the brake fluid, it is DOT 3, 4 or (5.1).
- If the water does not mix with the brake fluid it is DOT 5. 14)
The Color Check
- DOT 3 is available in Clear, Pale Yellow, Blue & Crimson Red.
- DOT 4 is available in Clear, Pale Yellow & Crimson Red.
- DOT 5.1 is available Clear, Pale Yellow & Blue.
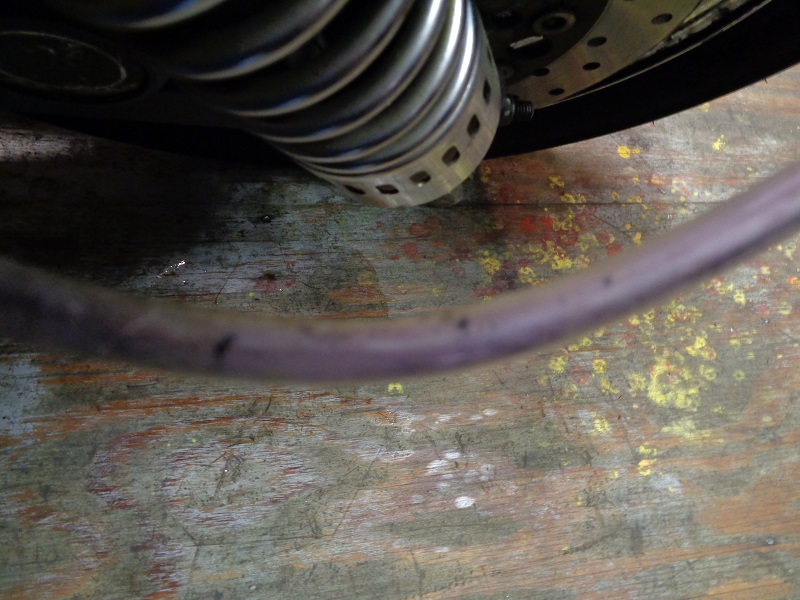
- DOT 5 is available in Purple & Violet. 15)
The presence or absence of color is not a safe criteria to distinguish between the different types of brake fluids. The color is added in brake fluid to detect leaks and color does not effect the quality of brake fluid. Since blue and purple sometimes can seem the same color depending on lighting, you could be mixing Dot 5 and DOT (5.1).
Mixing Brake Fluids
- Mixing different colors of the same type typically won't hurt the system as long as what you are adding to has not been compromised previously if your just topping off your existing fluid.
- You can typically mix DOT 3,4 and 5.1 fluids without damaging your braking system or compromising your existing braking performance. But as nearly every brake fluid manufacturer will state: doing so is not recommended. Why? Mixing good new fluid and old bad fluid means you will retain the bad fluid's performance and change the temperature ratings of your residual fluid. You can't mix any others with Dot 5 fluids. Mixing the others into Dot 5 would cause a meltdown of the rubber parts and/ or a break down of the silicone and possibly clog up the brake lines causing brake failure. Dot 5 into the others may release clogs into the brake lines also leading to brake failure.
- If silicone is introduced into an older brake system, the silicone will latch onto the sludge generated by gradual component deterioration and create a gelatin like goop which will attract more crud and eventually plug up metering orifices or cause pistons to stick. If you have already changed to DOT 5, don't compound the problem and change back. You will never get all of the silicone out of your system. Just change the fluid regularly. For those who race using silicone fluid, crack the bleed screws before each racing session to insure that there is no water in the calipers. 16)
DOT 3, DOT 4, DOT 5.1
- DOT 3 brake fluids are mixtures of glycols and glycol ethers. DOT 4 contains borate esters in addition to what is in DOT 3. These brake fluids are somewhat similar to automotive anti-freeze (ethylene glycol) and are not a petroleum fluid. Both DOT 3-4 and DOT 5 fluids are compatible with most brake system materials except in the case of some silicone rubber external components such as caliper piston boots 17)
- The problem with DOT 3-4 fluids is water absorption. DOT 3-4 glycol based fluids, just like ethylene glycol antifreezes, are readily miscible with water. Long term brake system water content tends to reach a maximum of about 3%, which is readily handled by the corrosion inhibitors in the brake fluid formulation. Since the inhibitors are gradually depleted as they do their job, glycol brake fluid, just like anti-freeze, needs to be changed periodically. 18)
- Fluid boiling point DOT 4 glycol based fluid has a higher boiling point (446F) than DOT 3 (401F), and both fluids will exhibit a reduced boiling point as water content increases.19)
- DOT 5.1 is also glycol-based and it's major difference to Dot 3 and 4 is it's dry boiling point (minimum 518F).
DOT 5
- The change to Dot 5 brake fluid was made with HD production motorcycles in September of 1976 20). It is of silicone chemistry and not being water miscible, it must rely on the silicone (with some corrosion inhibitors) as a barrier film to control corrosion. Water is not absorbed by silicone as in the case of DOT 3-4-5.1 fluids, and will remain as a separate globule sinking to the lowest point in the brake system, since it is more dense. 21)
- When using Dot 3 brake fluid, the brake system should be drained, flushed, and refilled with new brake fluid every year to eliminate any contamination such as sludge. This yearly service was eliminated when D.O.T.-5 silicone fluid was used instead and with improved performance. 22)
- Silicone brake fluid reduces corrosion, will not degrade the “rubber” components, and sludge will not form in the system. It will not absorb water, does not attack painted parts, and has a higher boiling point than conventional brake fluid. When stored under normal conditions it has unlimited shelf life. However, it is somewhat harder to bleed brakes with Dot 5 because of its viscosity. 23)
- Dot 5 in its pure state offers a higher boiling point (500F) however if water got into the system, and a big globule found its way into a caliper, the water would start to boil at 212F causing a vapor lock condition (possible brake failure). DOT 3 fluid with 3% water content would still exhibit a boiling point of 300F. Silicone fluids also exhibit a 3 times greater propensity to dissolve air and other gasses which can lead to a “spongy pedal” and reduced braking at high altitudes. 24)
Brake Fluid Boiling Points
- Dry Boiling Point: This is the temperature that your brake fluid will boil when its straight out of the sealed bottle. When there has been effectively no time for it to absorb any moisture. If you are racing on a track, you are most concerned with this value, since the fluid in your lines is likely to be freshly added. 25)
- Wet Boiling Point: This is the temperature that your brake fluid will boil when its been inside your braking system for a reasonably long time. How long it takes to get to this saturation point will vary by fluid type, but a good rule of thumb is the higher the dry boiling point, the faster the fluid will saturate (an informal sort of standard is…not always - used by fluid manufacturers: the wet boiling point is the reading taken after fluid has been sitting for one year in your brake lines). If you are riding mainly on the street the wet boiling point is going to be the one you want to pay attention to since the fluid will typically stay in your brake lines for an extended period of time. 26)
SAE Testing Brake Fluid Lubricity
- SAE is currently working on modernizing testing and standards for automotive brake fluids. Below are the standards that relate to brake fluid and their corresponding standard number.
- J1703- Motor Vehicle Brake Fluid Jul 20, 2015
- J1704- Motor Vehicle Brake Fluid Based Upon Glycols, Glycol Ethers and the Corresponding Borates Jul 20, 2015
- J1705- Low Water Tolerant Brake Fluids Apr 21, 2014
- J1707- Service Maintenance of SAE J1703 and J1704 Brake Fluids in Motor Vehicle Brake Systems
Links to Brake Fluid Comparison Charts on the Web
- Interesting amateur test on mixing brake fluids http://www.buckeyetriumphs.org/technical/Brakes/Fluid/Fluid.htm
Bleeding Brake Lines
Bleeding The Brake System By The Book
Notes:
- When checking the relief port operation:
- Spilling brake fluid on brake pads:
- The MoCo recommendation is “Caution should be used when bleeding because any brake fluid on the pad will contaminate the pad material and reduce brake effectiveness.
The fluid absorbed by the pads cannot be removed satisfactorily with any solvent or by operating the brakes”. 32)
When You Should Bleed The System
- Bleed the hydraulic brake system anytime a brake line, M/C or caliper has been opened.
- Whenever the brake pedal or lever operation feels spongy.
Before Bleeding
Arrange for the master cylinder to be in a level position by standing the bike upright (off the kickstand).
Manually Bleeding
- Install the end of a length of plastic tubing over the caliper bleeder valve. Place the free end of the tube in a clean container.
- Add new brake fluid to M/C until the fluid level is 1/8” (3.2mm) from the top.
- Depress and hold the brake lever / pedal to build up pressure.
- Open bleeder valve about 1/2 turn.
Brake fluid will flow from the bleeder valve through the tubing.
Close the bleeder valve when the lever / pedal has moved 1/2 - 3/4 of it’s full travel range.
Allow lever / pedal to return slowly to its original position. - Repeat steps 2-4 until air bubbles are purged.
- Add fluid and with the cover removed, actuate the lever to check the relief port.
Make sure there is a slight spurt of fluid upward verifying all the internal components are working properly. - Torque the bleeder valve to 80-100 in lbs. (9.0-11.3 Nm).
- Install the cap on the bleeder valve.
- Fill the M/C with new brake fluid to 1/8” (3.2mm) from the top.
- Torque the M/C cover screws:
- Turn ignition on and pump the brake pedal / lever to verify operation of the brake lamp.
- Do a test ride at low speed. Repeat the above procedure if the brakes feel spongy.
XLFORUM Bleeding Advice
Patience
- Don't give up!
Before bleeding
- Before attempting to bleed the lines;
- Remove the M/C top, actuate the pedal / lever and make sure you can see a bubble in the center to make sure the M/C is working.
- Pump hard on the brake pedal lever. You should see a small buble as mentioned above.
- If you see a geyser in the reservoir, you've torn the rubber cup in the master cylinder. 38)
(to avoid this in the future: open the bleeder when pushing your caliper piston in)
- Make sure that the system has been thoroughly cleaned/flushed of all old fluid and any debris.
- Fill the system/brake cylinder bowl with the correct fluid.
- Ensure that the relief port is clear of debris.
- Make sure the brake cylinder piston is fully retracted. 39)
- Notes regarding brake fluid:
- Notable interactions with air and different types of brake fluid: 40)
- When DOT 3, 4 or 5.1 fluids trap air, the smaller bubbles can migrate and come together to form bigger bubbles that are fairly easy to remove.
- When DOT 5 fluid traps air, the bubbles have some difficulty migrating, so the bubbles tend to be smaller and there are more of them.
Also, when you pressurize a DOT 5 brake system that has trapped air and then let the pressure off;
The DOT 5 fluid tends to break the original bubbles into even smaller and smaller bubbles.
What you end up with is a brake fluid that has lots of microscopic air bubbles and your brakes feel spongy.
- Paint peel-ability of different fluids:
- Dot 3,4 & 5.1 can peel the paint on frame and other painted parts.
- Dot 5 is silicone based and will not peel the paint.
You can spill DOT 5 brake fluid virtually anywhere and harm nothing. 41)
Bleeder valve issues
Before you strip the bleeder screw head:
Helpful wrench advice:
- Do not use an open ended wrench on the bleeder nipple 42) (unless it has already been stripped).
Use a 6 pointed box end or socket to match the 6 pointed head, 12 point wrench to 12 point head.
Using a 12 point wrench on a six point head will most likely end up stripping the flats. - This can happen when the wrong size / type wrench is used on the bleeder screw and / or too much torque was applied.
Next to come out of the toolbox is usually the vise-grip pliers.
This works sometimes but, when it doesn't, it will round off the rest of the hex head or break the screw in half. - You can also use a flare nut wrench. 43)
It looks just like a standard box end wrench except the box is slotted so you can get the wrench on brake fitting flare nuts.
After you strip the head.
Removing a stripped or worn down hex head on the bleeder valve:
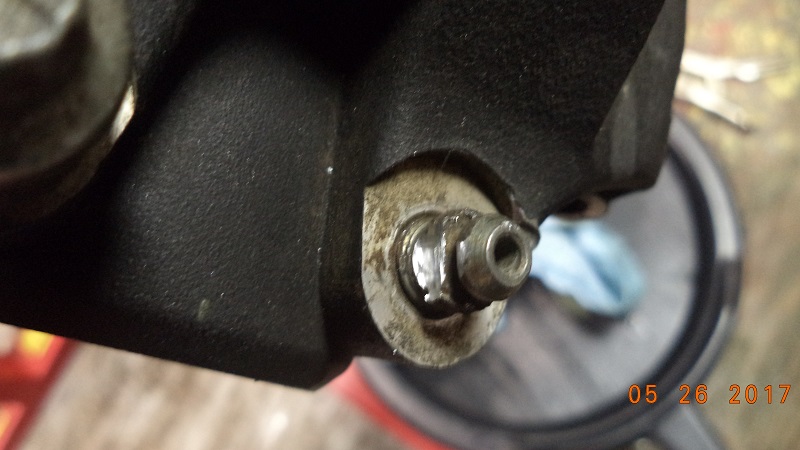
- You can use a Dremil tool with the metal cutting blade or even a small file and cut / form a flat on two opposite sides of the screw.
The heat generated will help and you can then use an open end wrench to remove the bleeder screw.
Then, of course, replace the bleeder with a new one.
 |
| Flats cut on two sides of bleeder screw 44) |
You can also remove the caliper and carefully placed it in my bench vice to get a better grip on the bleeder screw. 45)
Then use vice grips on the bleeder or cut 2 flats on it to remove the bleeder.
Clean the hole out with a brush / canned air and replace with a new the bleeder valve.
Broken off Bleeder Valve:
Brake fluid holds some moisture and can cause the screw to rust. 46)
Before doing any type removal of a broken off bleeder valve, it's best to remove the caliper.
That way, you don't introduce contaminates into the brake system.
- Possible fixes without removing the caliper:
- The valve already has a hole in it so you can try inserting an Easy-Out to remove it.
Careful as it takes no force at all to snap them off and they are hard to drill. 47) - Leave the bleeder alone. 48)
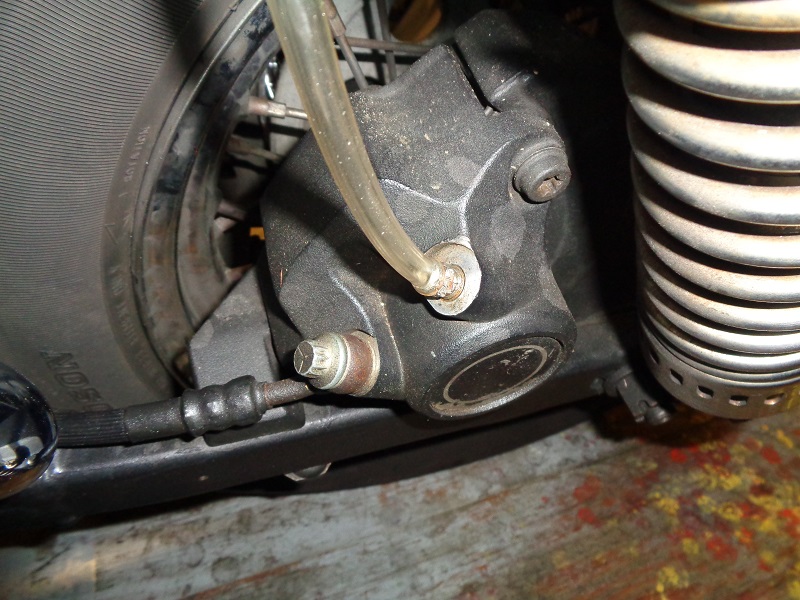
You can bleed fluid and air by slackening off the pipe fitting nut where the brake line screws into the caliper.
Loosen it as you squeeze the lever, tighten it before letting the lever go.
It's messy, but Harleys using DOT 5 fluid won't strip the paint.
Do it over the lawn or over an old newspaper and then wash down with soapy water when done.
The old broken nipple is not going to come loose . That is why it broke in the first place.
And all the air comes out the brake line connection as long as it's the highest point on the caliper.
And, you wont have to rebuild the caliper that way.
- Possible fixes by removing the caliper (and afterwards, replacing the seals):
Heat and / or lubricants (especially WD-40) can destroy the seals.- Spray the remains of the valve with penetrating lube, let it set a bit, then use an Easy-Out to remove the remaining piece. 49)
- Stop if it slips, and go back to soaking. 50)
Don't make your mission to get it out in one day.
Use a straight penetrating fluid, not penetrating fluid/lubricant. The lubricant will help the removal tool slip, as well.
- Remove the caliper, strip it completely and drill to the largest diameter possible without getting into the threads. 51)
Be careful not to drill through the seat. Lightly tap an easy out into the drilling, remove the easy out (don't try to remove the piece just yet).
Put heat directly on the bleeder until it just starts to glow red (the heat will travel quickly into the aluminum).
Invert a can of air and spray to quickly cool the bleeder (the heat will remain in the aluminum so you have to do the next part quickly).
Insert the easy out, give it a “light tap” and turn out the piece. - You could drill it and use 2 small picks to pick out the old bleeder threads. 52)
- After drilling to the maximum size without getting into the threads, install a 1/32“ bur on a Dremel tool. 53)
Take the remainder down to the threads in two spots 180 degrees from each other.
Use a pick to remove the leftover pieces of the bleeder (this is very tedious and time consuming).
- You could also try a left handed drill bit. 54) The heat generated and the (unthreading) motion may loosen it.
However, if you drill it, you'll need to completely disassemble the caliper to remove the swarf. 55)
If you ruin the threads, they make an 1/8” pipe thread adapter which has a bleeder screw in it. - Heat the caliper with a propane torch and try to unscrew the nipple with vice grips or drill it out with a left handed drill bit. 56)
The caliper is aluminum so it will expand and loosen the grip on the nipple. - You can use a “Brake bleeder repair kit” if the actual threads in the caliper are bad. 57)
You can get the kit at most auto parts stores.
Try a search for Dorman (13915) Bleeder Screw Repair Kit for 1/4" to 7/16" or 7mm to 10mm Screws
You will need to drill out the hole and tap for the new threads.- Here is another link: Harley FX FXE SPORTY front brake caliper bleeder repair kit
1/8“ clearance in the caliper wall is all that's required.
Drill out bleeder hole to 25/64” diameter and 3/4“ deep.
Tap with a bottoming tap 7/16”x20 (at least 10 threads).
Remove the chips.
- Search for a new or used caliper.
Attaching a hose to the bleeder valve
- A 5/16“ hose will work but 1/4” works better. 1/4“ is harder to get on but it won't slip off (as easily). 58)
Clear PVC hose works good (available at most hardware stores) and with it, you can see debris and air bubbles escaping (although any color will do.
You can also put a zip tie over the hose / bleeder just tight enough to keep it on the bleeder if needed. 59)
About 3-4 feet should do. You just need it to be taller than the caliper and where you can see it while pumping the pedal / lever. 60)
- In watching the air bubbles through a clear tube while pumping the brakes with the bleeder valve opened;
You will see force both push and pull the air.
General rule of thumb should be to push hard, release slow.
You push more air farther towards the outlet point when the force is faster.
When bleeding at the calipers, the tubing installed on the bleeder screw should be higher than the caliper to allow air to 'want' to go there.
Releasing the force (lever or pedal) fast will allow the air to suck back towards the master cylinder at the same speed it was forced out.
Releasing at a slow rate will allow more fluid than air to return by the time the lever / pedal stops home. 61)
- When attaching a piece of hose to the bleed valve on the caliper, place A box wrench on the bleeder first.
Then put hose over it on the valve. 62)
Where to buy syringes
A syringe can be used to reverse bleed from the bleeder valve to the caliper.
The syringes needed are the big ones (not an injection syringe as you'd normally see used in medical applications).
Leave the calipers on
- Rumor has it to take the calipers off to bleed the brakes.
There is no reason to do this unless you have a defective master cylinder.
Bleeding the lines with the calipers on is the best way to accomplish the chore and to keep from inducing more air or damage to the brake system.
Below are some good examples of this.
Bench bleeding a new master cylinder
- On a new master cylinder (or one that has been removed from the bike);
You can bench bleed it to purge the air out of the master cylinder before installing it onto your brake system. 67)- Hook up a short temporary line to it and leave the other end open.
- That open end is routed (must be clean) into the fluid in the master cylinder reservoir (in the fluid, not above).
- Then actuate the master cylinder until fluid starts pumping, and no more bubbles appear.
- Once this process is done, install the M/C, hook up your actual brake lines and continue bleeding at the caliper bleed screw.
Master cylinder issues
- If none of the methods below work for you;
You may either have a leaking compression fitting,
The cup in the master cylinder is blown out,
Or the big O-ring in the caliper is not sealing against the piston.
Those are the only three places for air to enter the system. 68) - A plugged or covered relief port can cause brake drag or locking of the brakes.
- The rear master cylinder is well noted for a split primary cup. 69)
- It seems to regularly rear it's ugly head when you replace the rear tire.
- If, after tying back the rear brake lever (and everything else you are trying), the brakes do not pump up correctly,
then just get the rebuild kit and follow the instructions. - It's quick, simple, easy, and if that cup is split you will never get it to bleed correctly regardless which method you try.
Methods
There are many methods of bleeding brakes from XLFORUM members as outlined below.
All will work some of the time and none will work some of the time.
What works for one person doesn't work for the next either.
The right way is the way that works for you!
Reverse Bleeding Thru the Calipers
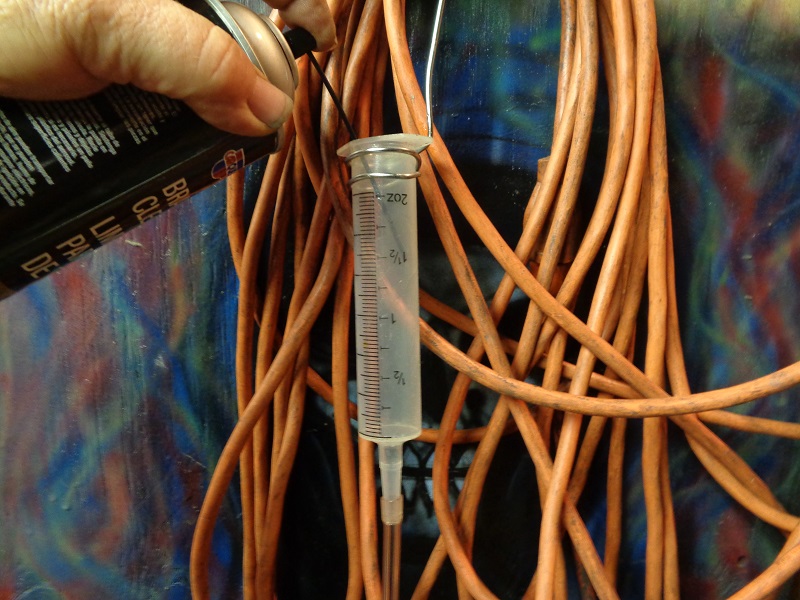
Using a Syringe
- The key to this method is a slow push from the caliper to the master cylinder. Too fast and you spit brake fluid all over the bike and the floor.
- The handle end of the master cylinder must be higher than the hose end so the air bubbles will move to the relief port of the master cylinder. 70)
- Discard the needle from the syringe, remove lid from master cylinder and re-set it on top. It must be off of course, but the master cylinder must be covered to prevent the fluid from squirting 10' across the shop. 71)
- Attach a short clear plastic tube to the end of the syringe. Best to use a tube that is “too small” in diameter - this is important to get a really tight seal on the bleeder to the point you have to force it onto the bleeder with needle nose pliers. 72)
- Use the syringe to empty the master cylinder and discard this fluid. 73)
- Fill the syringe with new brake fluid and let stand for 5 minutes or so for the bubbles to rise out of the syringe / tube. 74)
- Attach to bleeder, hold it upright and fiddle with the tube until air has risen into syringe. 75)
- Loosen the bleeder and slowly squeeze the fluid thru, do not release pressure on the syringe without tightening the bleeder - some fluid and possibly some air may get drawn back. 76)
Using a Vacuum Pump
- You can use a vacuum pump to reverse bleed fluid from a jar, up the brake line and into caliper. 77)
Force Bleeding Thru the Bleeder Screw
Using a Hose and a Jar
- Get a small rubber hose like for the windshield washer on your car about a foot long.
You may need to heat it to get it over bleeder valve tip.
Put it on the bleeder valve and place the other end in a jar submerged in brake fluid. You can use a jar with a lid and punch a hole the size of the hose in the lid.
This keeps the hose from coming out the fluid in the jar.
As you pump the brake and let off, the only thing it can pull back is brake fluid. The air goes out the fluid in the jar.
Do this awhile and you'll see no more air bubbles coming from the jar.
Close bleeder and your good to go.
Make sure to not let the master cylinder go dry while doing this. 78)
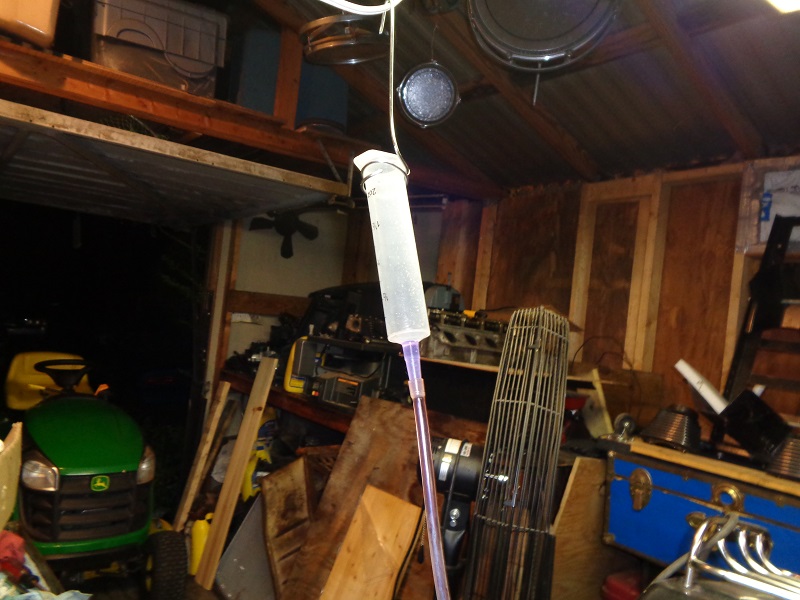
Using Gravity Assist
If you're bleeding air; 79)
You can use a clear hose on the end of the bleeder screw (hung high) and you can see exactly what's coming out the brake system.
This gives confirmation of the presence of air / debris as well as positive reinforcement that the air is being expelled.
You can watch the air move which helps in understanding how to remove it.
Below is an example of merely bleeding the air off.
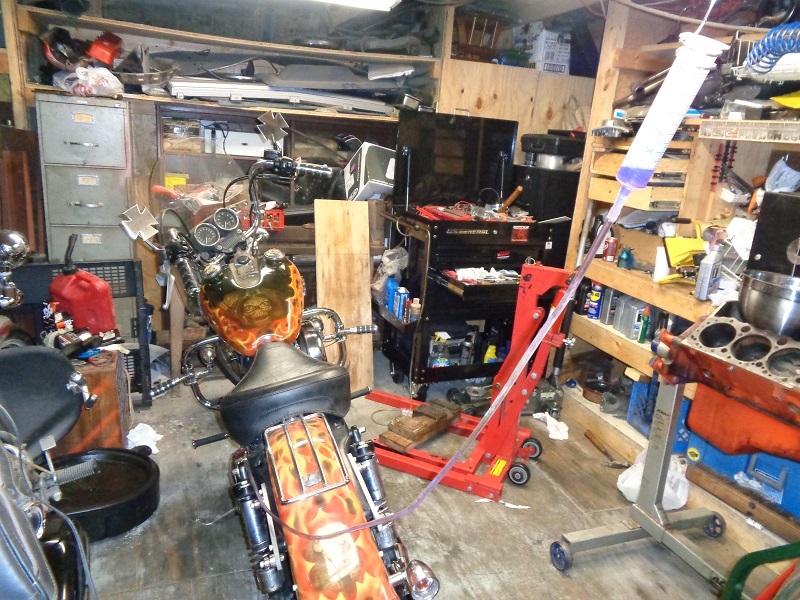
If you're changing fluid;
You can bring the hose up from the bleeder valve, tie it loosely somewhere on the side of the bike and then bring it back down into a catch can.
This will allow you to purge fluid out the hose and still control air.
The downstroke (pushing the pedal / lever), forces only what's in the lines already into the hose.
Releasing the pedal \ lever (at rest) is what adds fluid into the lines from the M/C.
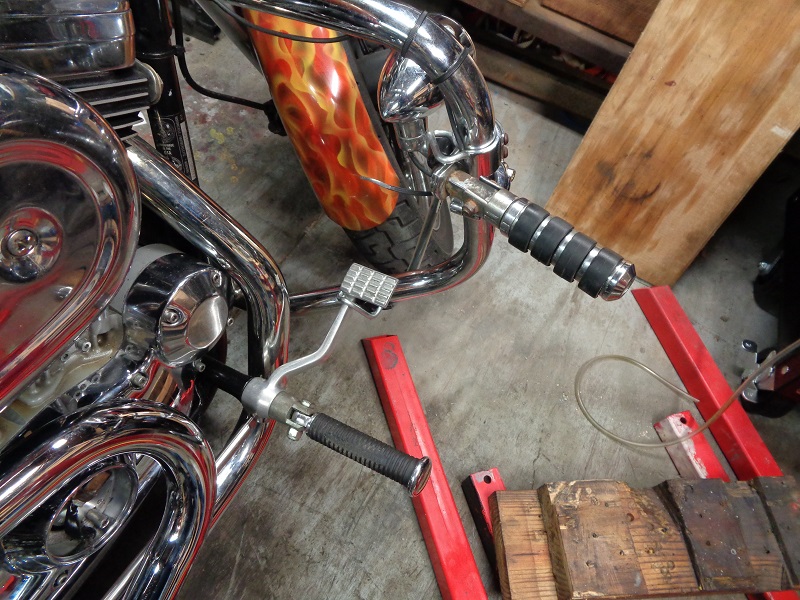
- Install a clear tube (from the hardware store) on top of the bleeder screw.
- About 3-4 feet is used in the pics below.
- You just need it to be taller than the caliper and where you can hang one end and see it while pumping the pedal / lever.
- Install the opposite end on a syringe (with the plunger removed) or small funnel.
If simply bleeding off air, see step 3.
If replacing fluid, skip to step 4. - Add enough fluid thru the syringe / funnel so you can see it in the hose from where you'll be working.
- Usually about 2 feet up from the bleeder screw on the rear, front will need to be a little higher with fluid.
- The fluid will creep on down toward the bleeder.
- Hang the open end of the line (with the funnel or syringe) overhead via clothes hanger wire hooked on both ends or use what you have.
- Crack the bleeder screw open.
- Open the M/C top.
- Verify that there is a small bubble in the center when you push the pedal / lever to make sure the M/C is working.
- With the top off, operate the pedal / lever to force air / fluid into the hose.
- A fast push sends air / fluid out of the clear hose.
- A slow release allows fluid to flow back into the caliper while the air pulls back slower than the fluid.
- The air will also creep up the hose when the pedal / lever is held down or fully released.
- You'll understand how the air moves out better when you see it.
- Don't let the M/C get low on fluid during this process.
- Repeat until you feel the pedal is getting a slight back pressure and no air is coming out into the hose.
- Top off the M/C, install the cover and take a slow ride to make sure the brakes are not spongy.
- Repeat the procedure if so.
Adding brake fluid to the hose uses gravity to pull fluid into the screw while air rises up the hose.
Don't add fluid to the hose if you're planning on flushing the old fluid from the M/C side.
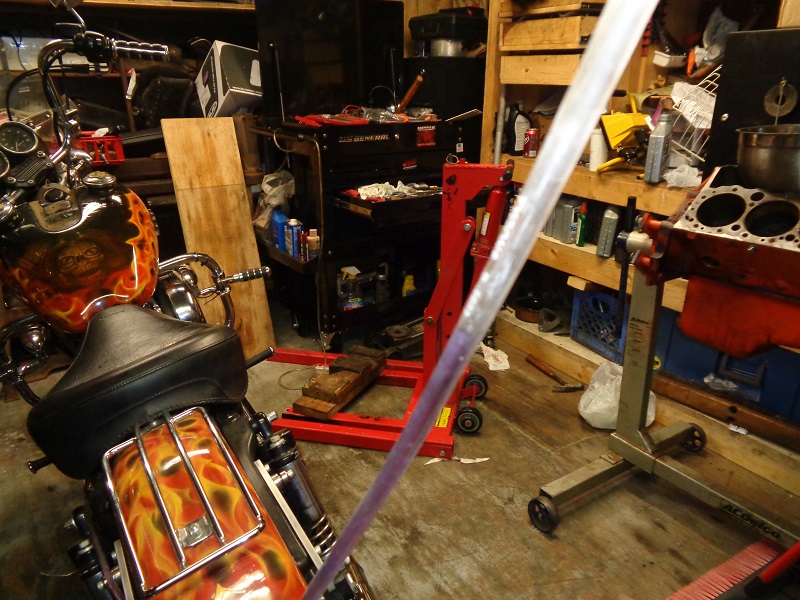
| Setting up the clear tube. It just takes elevation. Don't stretch the hose or it will come off the bleeder screw. 80) | ||
 |  |  |
Any fluid in the hose will fall to the bleeder screw.
Remove the M/C cover. You can leave it off for this procedure.
Operate the pedal / lever as described above. Fast push, slow pull.
| If you find sludge / goop in the M/C, Do Not operate the pedal / lever until you clean it out (this junk will be sent thru the system next). Use a paper towel to soak up the fluid and then wipe down the inside of the unit. 81) |
||
 | 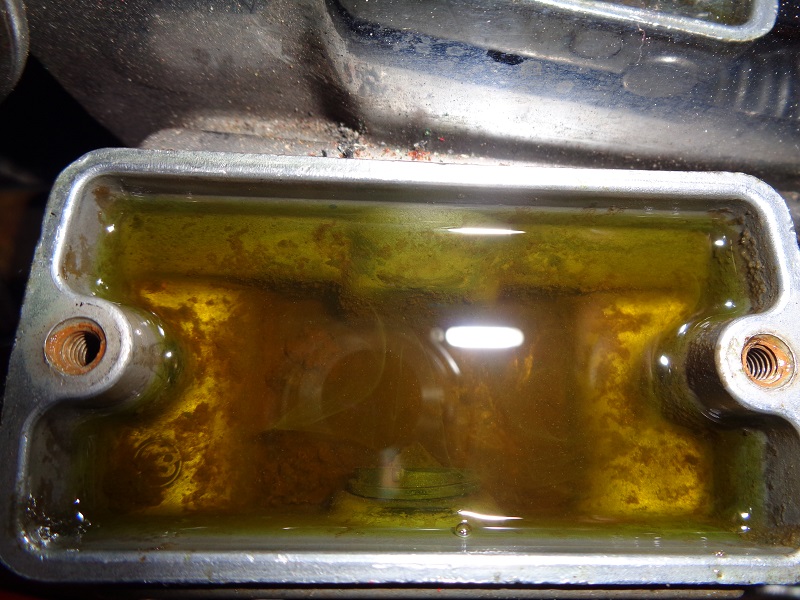 |  |
Notice the black particles in the pic below moved into the tubing from a fast push.
You can tie off the lever / pedal and watch the air move up past the fluid (that was pushed out only) but this is slow.
And it will not remove the air inside the system. Then you just have to do it again anyway.
When done, pinch the tubing, pull it off, tighten the bleeder and remove all the fixings.
 |  |  |
Install the M/C cap and check for brake pressure. If still spongy, repeat the above.
You can also use a small funnel on the open end of the tubing if you can find one small enough for the hose.
| The tubing below was cleaned afterwards with brake cleaner shot into it while stretched vertically. |
||
 |  |  |
Using the Finger Method
- First, top off the master cylinder and then remove the bleed screw completely. 82)
- Plug the bleed screw hole with your finger tightly.
- Have a friend or you can do it yourself, one at a time.
- Squeeze the brake while holding tightly over the bleed hole.
- The fluid and air will push past your finger and seal immediately when the brake is released.
- Your finger will let pressure spray out, but will not let air get sucked back in. 83)
- It's a lot easier and faster than the opening and closing a bleed screw.
- You can do dual calipers at once this way if you have a helper.
- Once you have a solid stream of fluid, you are fine. 84)
- This is exactly what Speed Bleeders do. They take the place of and act the same as your finger would. 85)
Using Speed Bleeders
- Simply clean the area around the old bleeder screw so that no dirt or contaminants can get into the brake system.
- Remove the old bleeder screw and discard.
- Screw in the Speed Bleeder into the wheel cylinder or caliper until it seats.
- Unscrew the Speed Bleeder 1/4 to 1/2 turn.
- Slowly pump the brake pedal approximately 4-5 times. (You do not have to close the bleeder screw between pumps.) A one way check valve lets the air and fluid out when the pedal is pressed and immediately closes between pumps preventing new air from re-entering the system between pumps.
- After bubble-free fluid comes out of the Speed Bleeder screw, close the bleeder until it seats.
- Proceed to the next caliper until all are bled.
- The Speed Bleeder screw has a check valve inside so it can't suck air at the bottom. They're cheap too! 87)
Speed bleeder part numbers by manufacturer. 88)
| Brand | Material | Size | Part# | Length | Notes |
| Russell Brand Speed Bleeders | Stainless Steel | 1/4-28 | R40525 | ? | HD (44179-58) |
| 3/8-24 | R40526 | ? | HD (44146-77) HD (44146-82) HD (44048-83) |
||
| 8mmX1.25mm | R40527 | ? | |||
| Steel | 1/4-28 | 639540 | 1” | ||
| 3/8-24 | 639590 | 1“ | |||
| 3/8-24 | 639600 | 1.5” | |||
| 8mmX1.25 | 639520 | 24mm | |||
| 8mmX1.25 | 639620 | 39mm | |||
| Goodridge | Stainless Steel | 1/4-28 | SB1428 | 1“ | XL Up to'77 Frt/Rr HD (44179-58) |
| 3/8-24 | SB3824 | 1.29” | XL '78-'03 Frt/Rr HD (44146-77) HD (44146-82) HD (44048-83) |
||
| 8mmX1.25mm | SB8125LL | 38mm | XL '04+ Frt/Rr | ||
| 8mmX1.25mm | SB8125L | 33mm | XL '04+ Frt | ||
| Dorman | Steel | 1/4-28 | 12703 | 1“ | |
| 3/8-24 | 12701 | 1.19” | |||
| 8mmX1.25 | 12705 | 28mm |
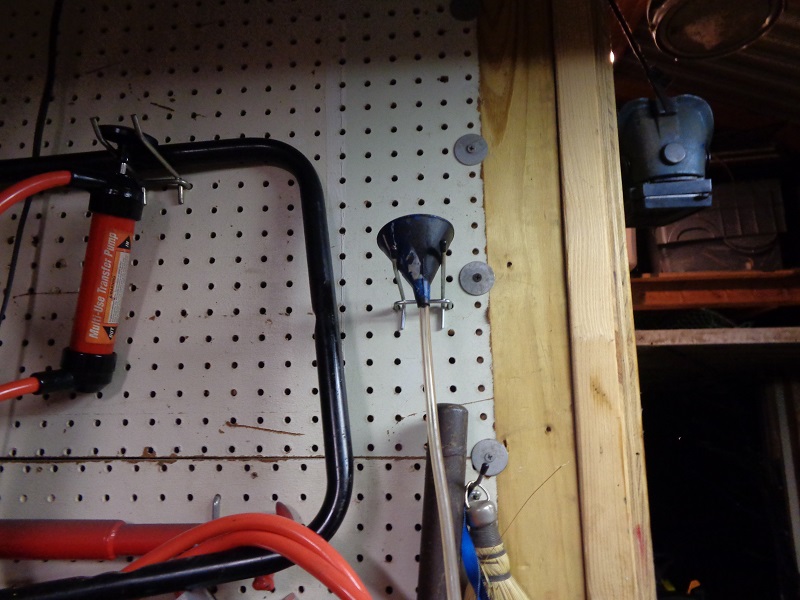
Vacuum Bleeding
You can get an inexpensive vacuum bleeder at most auto parts stores. 89)
Basically, you suck the fluid out of the system's hoses, calipers, and master cylinder using a small hand held vacuum pump (known brand: Mighty Vac). 90)
You draw all the air out with the brake fluid.
But it doesn't always work when tiny air bubbles are trapped in crevices etc. inside the internals of the master cylinder.
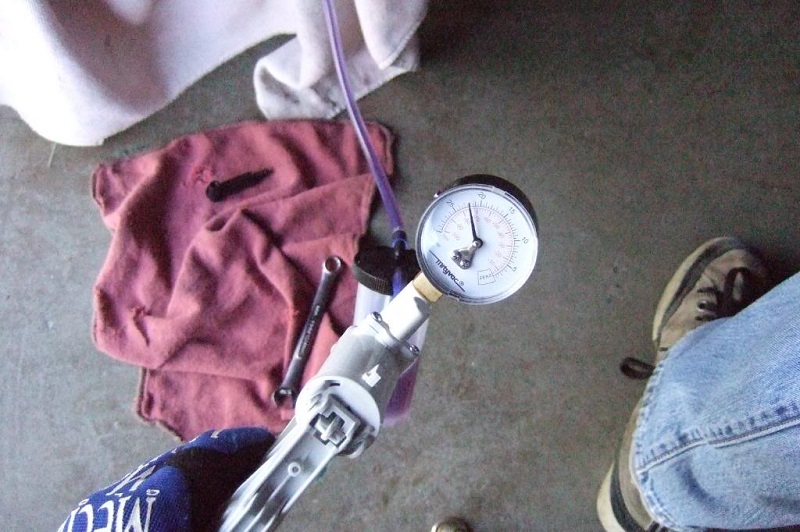
Mighty Vac
The Mighty-Vac's big point is assisting in clearing brakes lines of air bubbles, in lines that have high spots which air migrates to. 91)
If the system is void of those problem areas, a Mighty-Vac is not likely to work any better.
- Add some grease (or Teflon tape) on the threads of the bleeder to keep air from getting past the threads while using the vac. 92)
- Low vacuum is best. Too much and you pull air past the seals and it just looks like the air is never going to quit (because it isn't).
- Also make sure to maintain a vacuum or it could let air back in. 93)
- Hook the vacuum line to the bleed screw, that line goes to a collector jar that has an additional port that goes to the vacuum pump.
Pump it up, open the screw, and keep vacuum until it's a steady stream of fluid, then close it off. 94)
This will still take several tries until you get fluid. Make sure you keep an eye on the bowl and don't let the fluid get to low or u will start to suck air.
Once you get fluid, close bleeder and try to pump the brake pedal ..when get pedal…then bleed manual to ensure that all air has escaped. 95)
| Mighty Vac for sucking brake fluid from the master cylinder and out the bleeder screw. 96) | |
 |  |
Aquarium Pump
You can hook up one of the cheapo aquarium pumps to the brake bleeder. 97)
Setup is pretty straight forward.
The lower volume pump is all you need and they are usually between $10 and 15$ at Walmart or others.
- Install the inlet hose to the bleeder valve.
- Install the outlet hose in a container.
- Remove the M/C top.
- Open the bleeder screw and power on the pump.
- Keep an eye on the fluid level in the master cylinder and don't let it go low.
Binding the Pedal / Lever
- This method relies on time under pressure where the microscopic bubbles migrate up the line to the reservoir.
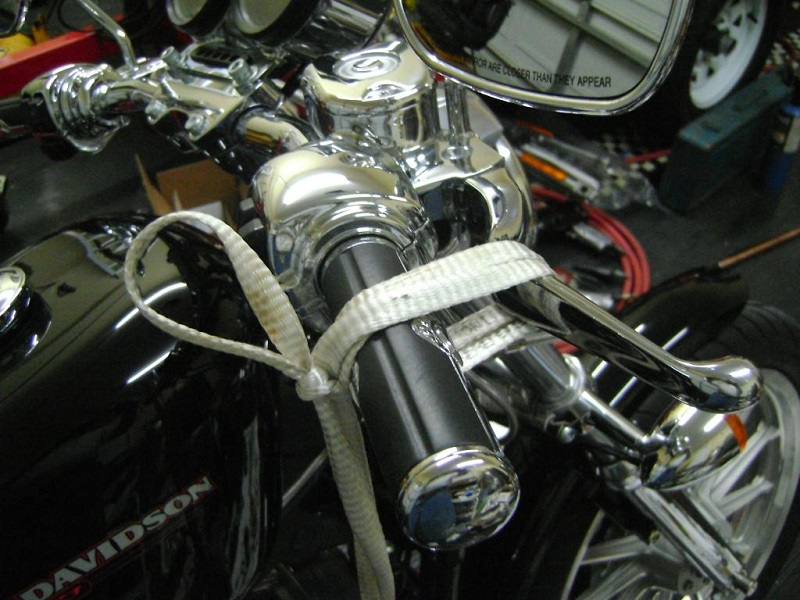
- For the front, tie the brake lever to the grips with rope or a zip tie overnight. 98)
- With the bike on the side stand turn the bars so the master is positioned with the banjo bolt head pointing slightly downward. 99)
This puts the tiny feed hole in the master uphill of everything.
This is critical to getting the air up and out of the system.
Then while applying normal light to medium braking pressure on the lever, wrap some tape around it and the throttle grip to hold it there.
Let it stay like that at least overnight. The next day remove the tape and work the lever. It will feel firmer than it has ever felt.
By keeping the fluid under extreme pressure over an extended period of time;
It forces the microscopic bubbles to migrate together into large enough bubbles to slowly work it's way up the line and through the master cylinder.
- For the rear, the front tire needs to be elevated enough to set the rear master cylinder higher than the caliper / brake lines.
- Either you'll have a firm lever / pedal in the morning or you'll see leaking in the assembly, lines, banjos.etc.
 |
The Tickle and Tap Method
With this method, you leave the bleeder screw closed. 100)
(this won't work for the rear with the M/C lower than the caliper)
Take take the cap off of the master cylinder and flutter the lever.
You barely have to move it back and forth. Just continuously tap it from the front with your hand and you will see air bubbles coming up.
Air should rise through liquid.
Stop every once and a while and tap the line with the handle of a screwdriver to free any stuck air bubbles.
- With the bike on a lift or the jiffy stand, turn the front wheel to the LEFT until the front master cylinder is as close to level as possible. 101)
Squeeze the brake lever as far as you can and note how the brakes feel and how far the lever moves. - Clean the area around the reservoir cap, remove the cap and top off the brake fluid.
Leave the cap off. - Starting at the front caliper, gently rap the brake line with a screwdriver handle or similar tool, working your way up the brake line.
- Slowly squeeze the brake lever until you just start to feel some resistance.
- Quickly release the brake lever letting it “snap” against the mechanical stop.
(you should see small bubbles coming out of the small port in the piston bore) - Repeat steps 3 through 5 several times.
The size and quantity of bubbles should decrease. - Slowly squeeze the brake handle as far as you can.
Note brake feel and lever travel and then quickly release the brake lever. - Repeat steps 3 through 7 as necessary.
- Top off the master cylinder and install the cover.
Gravity Bleeding
- This takes a while, but it works. Open the bleeders and wait for a steady leak and close the bleed screw. Should be good. 102)
- Try leaving the top off of the master cylinder overnight. Sometimes the air will work itself out over a few hours. 103)
- Tap the line lightly to help move bubbles that may be stuck somewhere in the system. 104)